Using Android OS App
The Main Menu
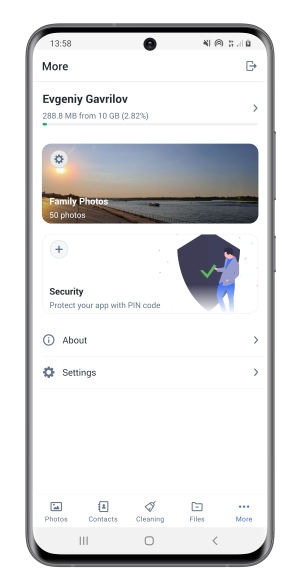
The main menu displays the following sections at the bottom of the screen: photos, contacts, cleaning, files and more. The more section can be accessed by tapping on the three dots icon on the bottom right of the screen. It contains the following sections: the current storage usage, family photos, security, about and settings.
Notifications
There are several types of notifications in the application. They are below:
- User performs a manual backup of Contacts.
- Daily backup is done.
- Weekly backup is done.
- New photos are uploaded.
- New album is created.
- User adds a new user to his or her Family Cloud.
- User leaves Family Cloud.
- Family Cloud owner removes a member from Family Cloud.
- User creates a new Family Cloud album.
- User deletes a Family Cloud album.
- User uploads a file/files to Family Cloud.
- User removes a file/files from Family Cloud.
Enable auto backup and auto upload in the Settings menu to make most of the notifications available!
Photos
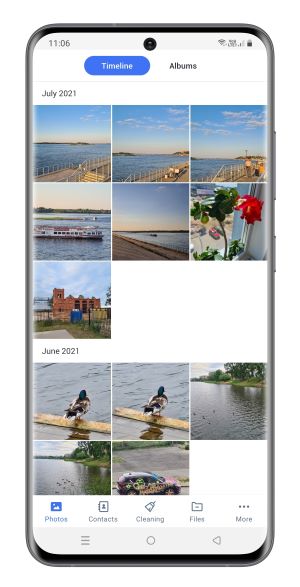
The section “Photos” is the primary section of the app. It is the storage of all photos backed up and uploaded to the Cloudike app and moved to the folder “Photos”. The app will give you the option to group your photos chronologically as a timeline (which organizes images and videos by date, with the newest ones at the top) or in albums. The photo albums and the timeline on the Photos page are ways to share and organize your photos through Cloudike. To switch between views select Timeline or Albums at the top of the page. Below is an example of the page "Photos"
If Autoupload is disabled you will see a reminder to enable it at the bottom of the page.
If Storage permission is not granted you will see a reminder to give access to resume upload.
Searching Your Photos by Location
You can do location-based searches. Instead of trying scrolling through a timeline looking for the photos you took in a specific place, you can just search for that place, and all the pictures from that location will pop right up. To search your photos by the location where a photo was taken, use the search bar (magnifier) in the upper right hand corner of the screen.
To begin your search:
- Tap on the magnifier
in the upper right hand corner of the screen
- Enter the location you'd like to find photos from
Working with photos in a timeline
To perform any operation, you need to select or open a photo. You can select a photo by using a long tap.
You can also select multiple pictures by pressing down on one of them for a few seconds until a circle with a check appears in the upper left of each image; then tap photos one by one to select them.
After a photo has been selected the following actions are available:
Table 1. Actions with photos available when a photo is selected:
| Operation | Description |
|---|---|
| Share a photo | |
| Add a photo to album | |
| Copy a photo to family storage | |
| Download a photo | |
| Delete a photo |
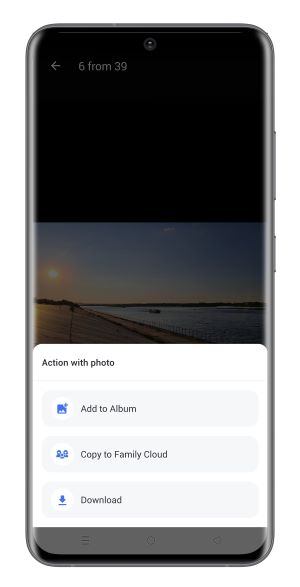
You can open a photo and use the photo menu to perform the following actions:
Table 2. Actions with photos available from the photo menu:
| Operation | Description |
|---|---|
| Add to album | |
| Copy to Family Cloud | |
| Download a photo | |
| Share a photo | |
| Delete a photo |
Working with Albums
Photo albums allow you to share a set of photos with others (even non-Cloudike users). To perform any operation with an album, you need to select or open it. You can select an album by using a long tap. The following operations are available with the Albums:
Table 3. Actions available from the album submenu
| Operation | Description |
|---|---|
| Add any photo to album. | |
| Share an album via social networks. | |
| Delete an album. |
Table 4. Actions with Albums available when an album is selected
| Operation | Description |
|---|---|
| Share an album via social networks. | |
| Delete an album. |
Creating an album
To create an album, click  in the rignt down corner of the screen, enter a title, select photos and click the check mark.
Family Photos
Every Cloudike user can have a Family Cloud. The Family Cloud feature allows its members to collaborate on the same set of files or albums. Any additions, changes or deletions made by any Family Cloud member will be seen by all Family Cloud members. Family Сloud members only have access to the folder the owner shares with them, and not to the other contents of Cloudike. This makes Family Cloud feature ideal for collaboration on work projects. All Family Cloud members always have the latest version of the files.
Files added to the Family Cloud by any of its members and changes made to Family Cloud contents become automatically available to all other Family Cloud members.
You cannot join several Family Clouds!
In this section you can view shared files seen to all Family Cloud members. Files can also be organized in Albums or as a Timeline. Actions with family photos are the same as for user photos.
Managing family
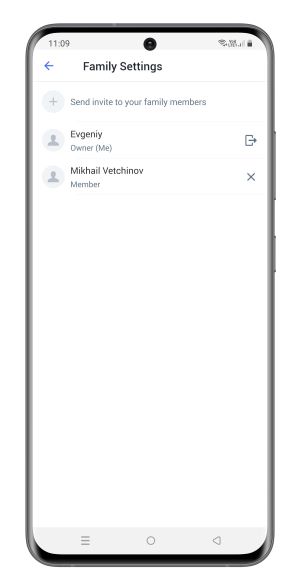
To view a list of current family cloud members or invite other users to join your Family Cloud, tap  and then
 in the center of the screen.
To share an invitation link, tap Send invite to your family members.The Share button brings up the standard options for your Android phone, such as email, Facebook, Twitter or text message. These options depend, in part, on which apps you have installed on your phone. (If you have a Gmail account, you also see thumbnails of suggested contacts to email directly.) You can also copy a link and paste it into an email, text or other message. That URL isn't tied to the person you send it to; anyone with the URL can join your Family Cloud.
That's what the invitation looks like. An invitee can either log in and join or register and join if he or she doesn't have a Cloudike account.
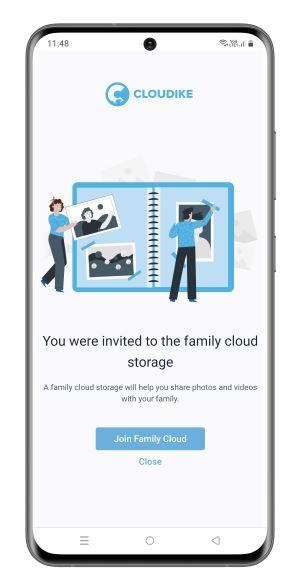
After sharing has been completed, a new Family Cloud member appears in a list.
To remove a user tap Remove user. After action has been confirmed the user is removed from a list.
Files
Click Files on the bottom navigation menu to see all of the files stored in your Cloudike account. The files can be organized into folders and sorted by different criteria. This section is also designed for adding new files to the Cloudike storage.
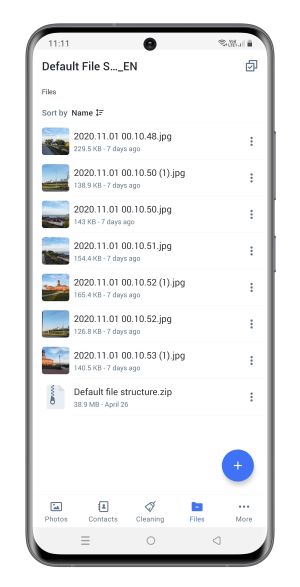
Adding Photos, Videos and other files
To Add Photos, Videos and other files tap the plus button  in the right bottom corner of the page. The following menu appears:
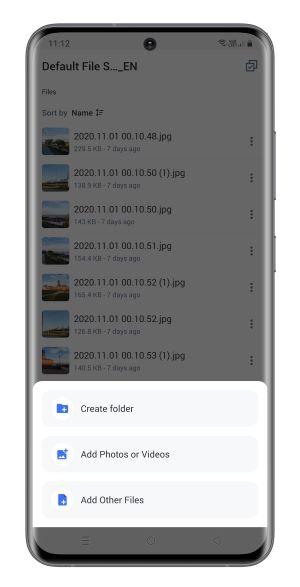
Then for adding a file, photo or video tap a corresponding button, select files for uploading in Cloudike and tap Upload.
To create a folder tap Create Folder, enter a name and tap Create.
Sorting Files and Folders
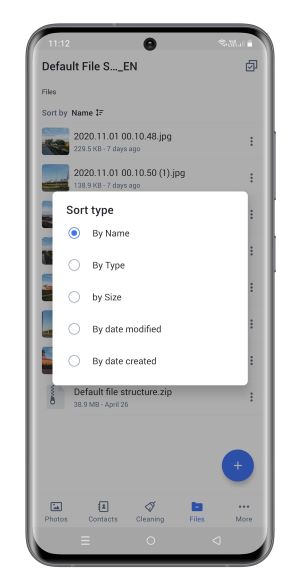
To sort files or folders, tap the sort icon in the upper part of the screen. You will be prompted to select a sort type as shown below.
Actions with files available from the submenu when file is selected
Actions with files in the submenu in the upper right corner of the screen ![]() are quite similar to those with photos. When a file is selected by using a long tap, it can be renamed, deleted, copied, moved, exported, downloaded, moved to Offline, shared via social networks and opened with other application.
are quite similar to those with photos. When a file is selected by using a long tap, it can be renamed, deleted, copied, moved, exported, downloaded, moved to Offline, shared via social networks and opened with other application.
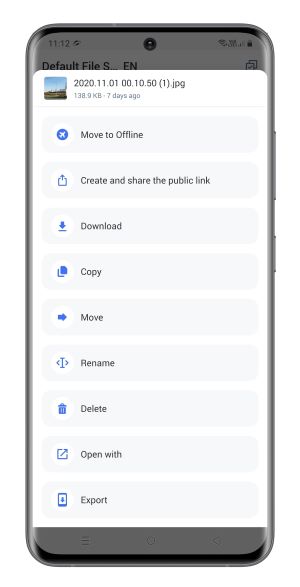
Actions with files available from the file menu when file is opened
When you open a file you will be able to perform the same operations with it. The only difference is that from the file menu you cannot share a file via social networks. Below is the full list of actions applicable to files from the file menu:
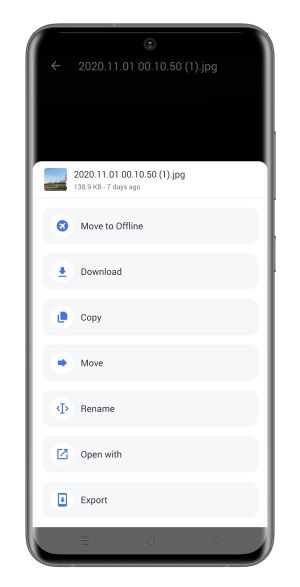
Table 5. Actions with files available from the file menu
| Operation | Description |
|---|---|
| Move a file to Offline | |
| Download a file to your device | |
| Copy a file to Cloudike location | |
| Move a file to Cloudike location | |
| Rename a file | |
| Open a file with a third-party application | |
| Export a file | |
| Share a file via social networks | |
| Delete a file |
Offline Mode
It is possible to view any file stored in Cloudike offline if it has been previously saved locally. When a file is available offline, you can access that file even when your phone isn't connected to Wi-Fi or data.

Contacts
One of the main features of the Cloudike is a backup of contacts. To ensure your data is safe, use the backup feature. It can be manual or scheduled. User can also choose a backup frequency and backup sources.
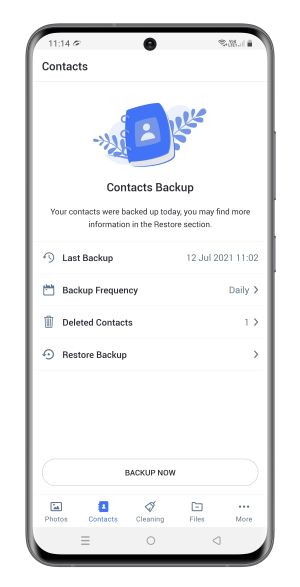
To run a manual backup, it is necessary to go to the Contacts section and tap Backup now
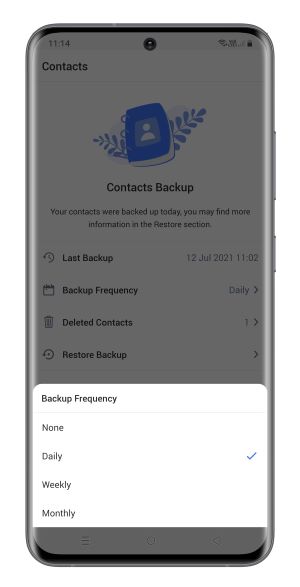
If scheduled backup is required, select backup frequency:
Contacts can be backed up from different sources. To choose which sources you want to backup contacts from tap Backup sources and tick the box with account as shown below and tap Restore Selected.
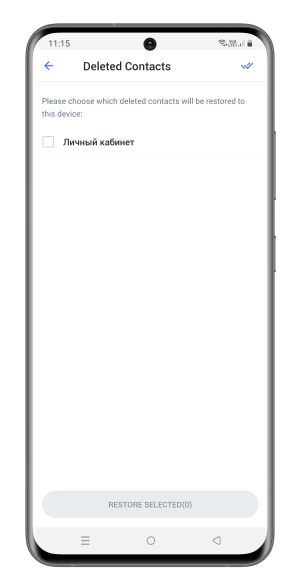
You can also restore deleted contacts if necessary. Accidents can happen – if your phone is not working properly or if you buy a new phone, or want to dispose of or recycle your phone, you can restore contacts on other device.
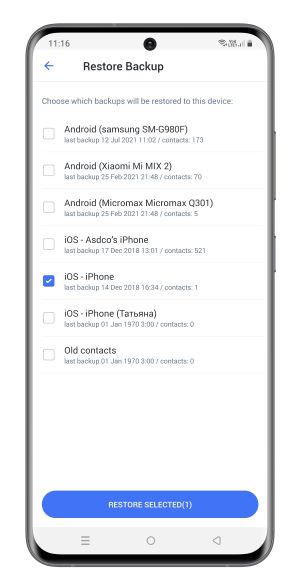
To restore data, select a device you want to restore data from and tap the Restore Selected button. Data is restored!
Cleaner
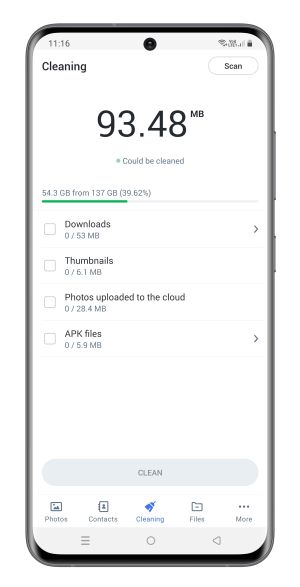
If phone memory is running out, you do not need to permanently delete all data. The Cleaner feature enables you to get more free space on your device by deleting only the data already transferred to the cloud. To clear memory, tap  __ -> Cleaning -> Clean __
About
In this section, user can perform various operations such as sharing opinion regarding the application, rating the application in Google Play, deleting cookies and clearing cache.
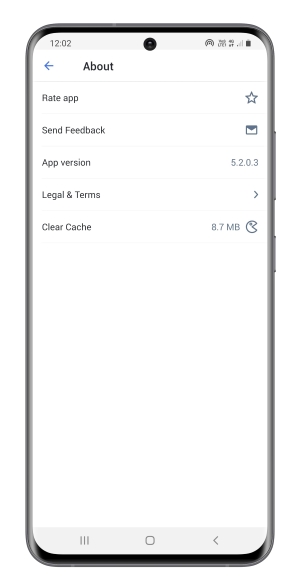
Below are the lines represented in this section and their description:
Table 6. About Section
| Line | Description |
|---|---|
| Rate App | User can rate the application in Google Play Store. |
| Send Feedback | User can share his/her opinion about the app and send a detailed report. |
| App version | User can review a specific information about the app version installed on the device. Versioning is a critical component of the app upgrade and maintenance. |
| Legal & Terms | User can review Cloudike Privacy Policy and Terms and Conditions in this section. |
| Clear cache | User can delete cookies and clear cache in this section. |
| Logout | User can log out of his or her Cloudike account from the Android device in this section. |
Settings
To manage your account settings, enter the “Settings” menu. It is located in the centre of the sliding panel.
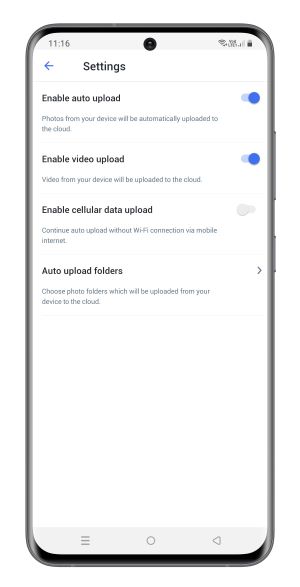
Below are the lines represented in the Settings Menu and their description.
Table 6. The Settings Menu
| Line | Description |
|---|---|
| Enable Auto Upload | If enabled, Cloudike app automatically backs up all photos taken with a phone camera. |
| Enable Cellular Data upload | If enabled, Cloudike app backs up data via mobile Internet when Wi-Fi is off. |
| Enable Video Upload | If enabled, Cloudike app automatically backs up Video content. |
| Auto upload folders | User can select folders to back up in the Cloudike. |