Using iOS App
The Main Menu
The main menu is hidden in Cloudikes’s left sidebar. It can be accessed by swiping to the right from the left edge of the screen, or by tapping on the menu icon (three lines) on the top left of the screen  . The sidebar displays the menu sections, as well as current storage usage and the settings gear icon
 at the bottom of the screen. The menu sections are divided into personal and family. Below is a short description of these sections.
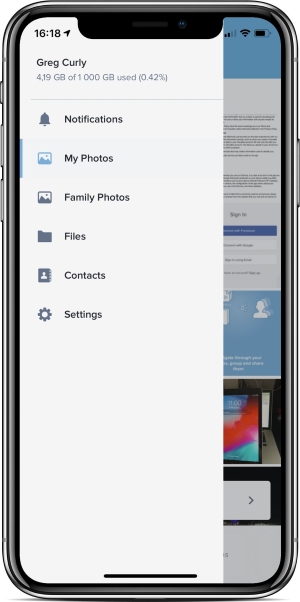
The Main Menu
Notifications
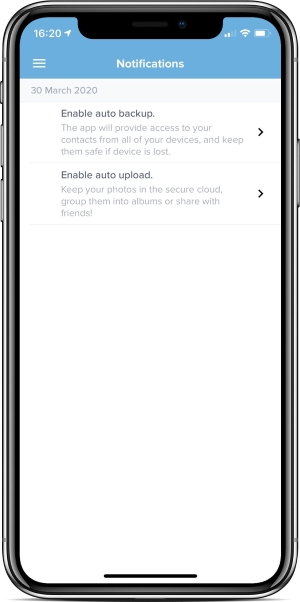
The Notifications page is the first page you will see after installation and making initial settings. This section allows a user to view notifications triggered each time a certain action is performed.
There are several types of notifications. They are below:
- User performs a manual backup of Contacts.
- Daily backup is done.
- Weekly backup is done.
- New photos are uploaded.
- New album is created.
- User adds a new user to his or her Family Cloud.
- User leaves Family Cloud.
- Family Cloud owner removes a member from Family Cloud.
- User creates a new Family Cloud album.
- User deletes a Family Cloud album.
- User uploads a file/files to Family Cloud.
- User removes a file/files from Family Cloud.
Notifications
My Photos
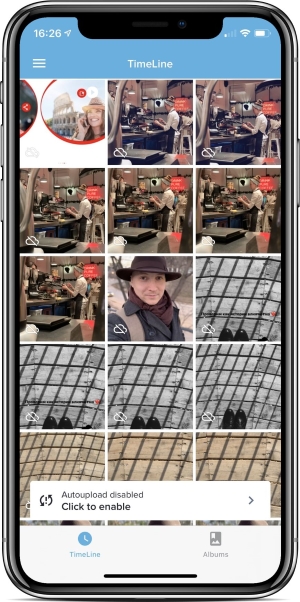
The section “My photos” is the storage of all photos backed up or uploaded to Cloudike and moved to the folder “My Photos”. Photos can be stored chronologically as a timeline (which organizes images and videos by date, with the newest ones at the top) and in albums. The photo albums and the timeline on the Photos page are ways to share and organize your photos through Cloudike.
To switch between views, select "Timeline" or "Albums" at the bottom of the page!
My Photos
Working with photos in a timeline
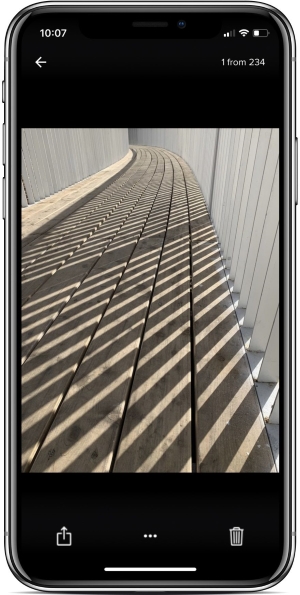
To perform any action with a photo, you need to open a it by tapping or select a photo by using a long tap.
You can also select multiple pictures by pressing down on one of them for a few seconds until a circle with a check appears in the upper right of each image; then tap photos one by one to select them.
Then, the following actions are available:
Table 1. Actions with photos
| Action when a photo is selected | Action when a photo is opened | Description |
|---|---|---|
| Share a link to the photo by email or in SMS message. | ||
| You can add a photo to a personal album or to a family storage. | ||
| Delete a photo. |
Actions with a photo
Working with Albums
Photo albums allow you to share a set of photos with others (even non-Cloudike users).To perform any operation on an album, you need to select or open it. You can select an album by pressing and holding the album for 2 seconds.
The following operations are available with the Albums:
Table 2. Actions with albums available from submenu
| Operation | Description |
|---|---|
| Create a new album. Enter a name, then select photos, tap __ |
Table 3. Actions with Albums available when an album is selected
| Operation | Description |
|---|---|
| Share a link to an album by email or in SMS message. | |
| Delete an album. | |
| Edit an album |
Family Photos
Every Cloudike user can have a Family Cloud. The Family Cloud feature allows its members to collaborate on the same set of files or albums. Any additions, changes or deletions made by any Family Cloud member will be seen by all Family Cloud members. Family Cloud members only have access to the folder the owner shares with them, and not to the other contents of Cloudike. This makes Family Cloud feature ideal for collaboration on work projects. All Family Cloud members always have the latest version of the files.
Files added to the Family Cloud by any of its members and changes made to Family Cloud contents become automatically available to all other Family Cloud members.
You cannot join several Family Clouds!
In this section you can view shared files seen to all Family Cloud members. Files can also be organized in Albums or as a Timeline. Actions with the files are the same as for the section My Photos See 3.2.3 "My Photos"
Managing Family
In this section you can view a list of current family cloud members. To invite other users to join your Family Cloud, share an invitation link with them. To share an invitation link, tap  -> Settings -> Manage family -> Send invite to your family members. The Share button brings up the standard options for your iOS phone, such as email, Facebook, Twitter or text message. These options depend, in part, on which apps you have installed on your phone. (If you have a Gmail account, you also see thumbnails of suggested contacts to email directly.) You can also copy a link and paste it into an email, text or other message. That URL isn't tied to the person you send it to; anyone with the URL can join your Family Cloud.
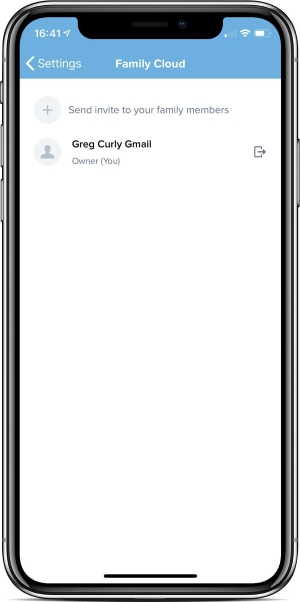
Sharing the Family Cloud Invitation Link
That's what the invitation looks like.
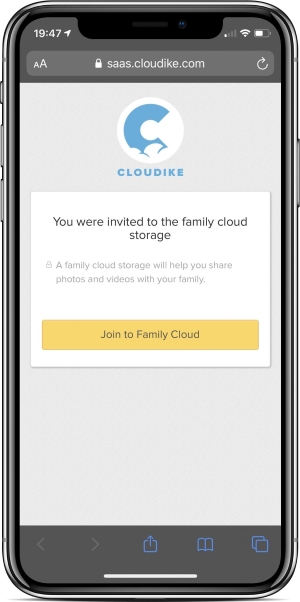
Family Cloud Invitation
After sharing has been completed, a new Family Cloud member appears in a list.
To remove a user, tap against the family cloud member and Remove user. After the action has been confirmed the user is removed from a list.
Files
This section is designed for adding new files and viewing all the files available in Cloudike. The files can be organized into folders and sorted by different criteria.
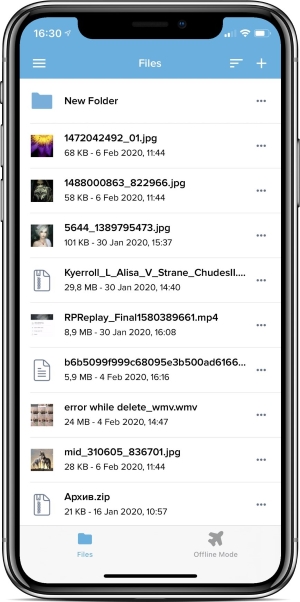
The Files Section
Adding Photos, Videos and other files
To Add Photos, Videos and other files tap in the right upper corner of the page. The following menu appears:
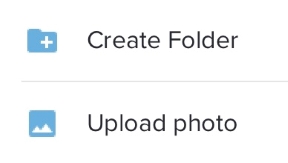
Uploading Files. Creating Folders.
To add a file, photo or video, tap , select files for uploading in Cloudike and tap Upload.
To create a folder tap , enter a name and tap Create.
Sorting Files and Folders
To sort files or folders tap the submenu in the upper right corner, and then select the sorting criteria.
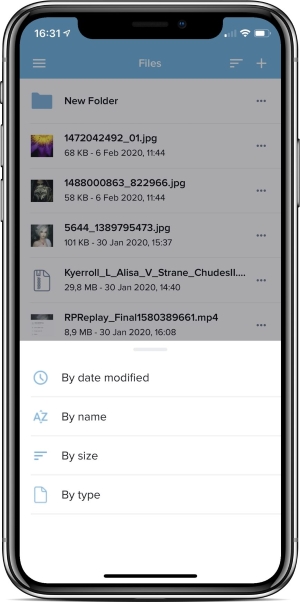
Selecting a Sort Type
Actions with Files
To perform any action with a file, you need to open a file by tapping. Then, the following actions are available:
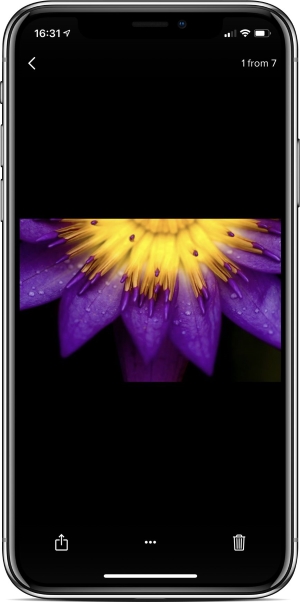
File Menu
Table 4. Actions with files and folders
| Operation | Description |
|---|---|
| Delete a file or folder | |
| Save to camera roll. Choose a photo to save as a file. | |
| Open with ... Open a file with a third-party application. | |
| Add to Offline mode | |
| Create a public link | |
| Export | |
| Copy a file or folder. | |
| Move a file or a folder to any Cloudike location. Also, you can create a new folder and move the file there. | |
| Rename a file. | |
| Delete a file. |
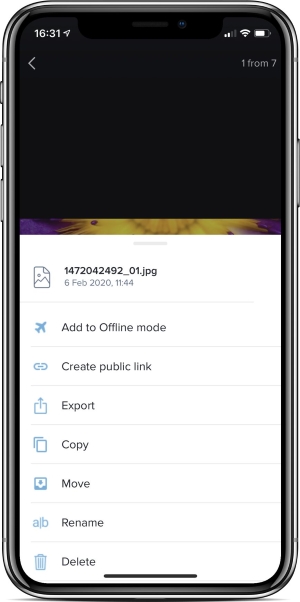
Actions with File
Offline Mode
It is possible to view any file stored in Cloudike offline if it has been previously saved locally. All files available for offline viewing can be found in the "Offline Mode" tab at the bottom of the page.
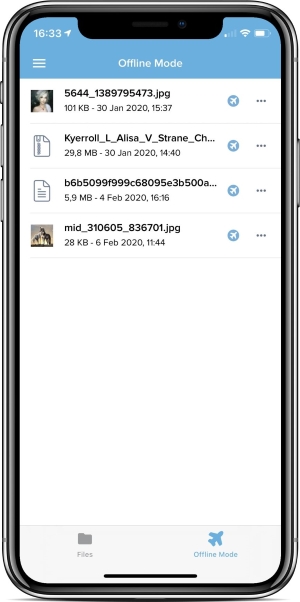
Offline Mode
To make a file available offline it is necessary to open a file and tap ->Add to Offline mode.
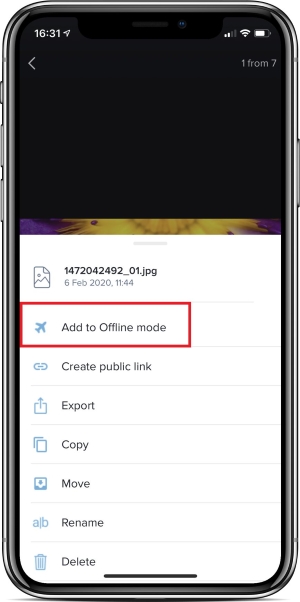
Setting Offline Mode
Contacts
One of the main features of the Cloudike is a backup of contacts which can be restored anytime. A backup can be manual or scheduled. In this section, user can also recover deleted contacts and choose a restore source for backup.
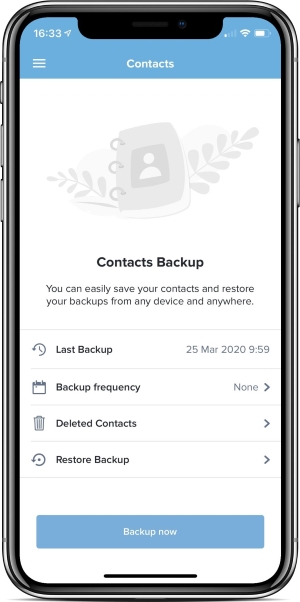
Contacts Backup
To run a manual backup, it is necessary to tap Backup now.
If scheduled backup is required, select backup frequency:
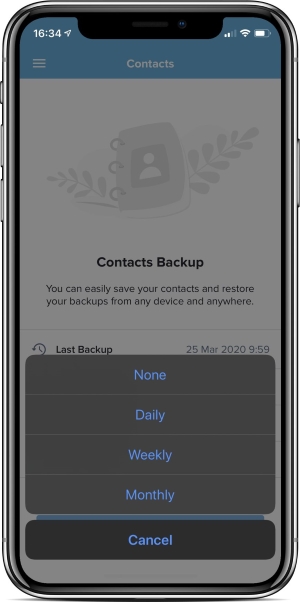
Setting backup frequency
You can also restore deleted contacts and choose a source of backup you want to restore. To restore deleted contacts, tap Deleted contacts and put a tick against the contact, then tap Recover selected.
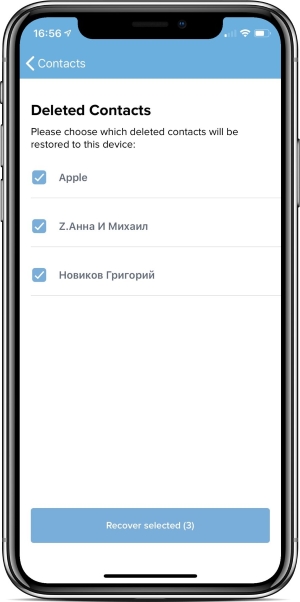
Restoring deleted contacts
Contacts can be backed up from different sources, so to choose which sources you want to backup contacts from tap Restore Backup -> Restore Sources and tick the box against the account as shown below and tap Choose.
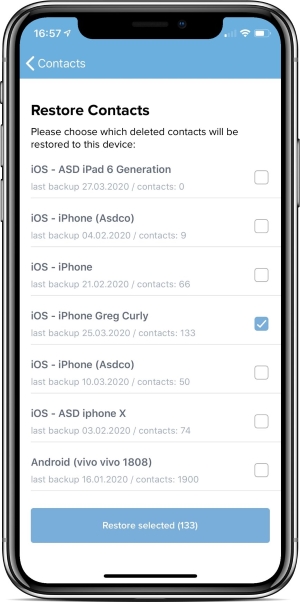
Selecting backup source
To restore a backup of contacts, simply tap Restore selected
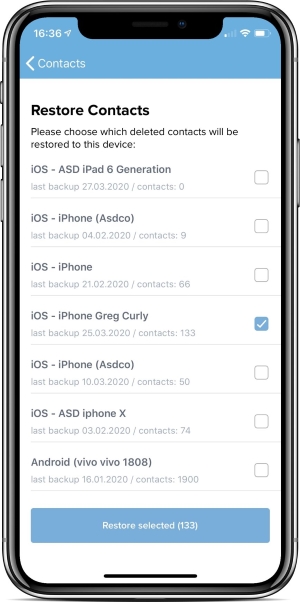
Restoring backup
Settings
To manage your account settings, enter the “Settings” menu. The Settings menu is located at the bottom of the sliding menu panel and depicted as a gear icon.
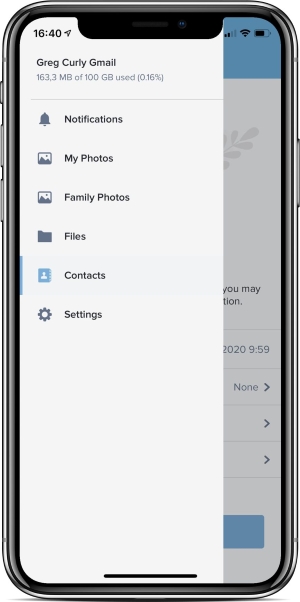
Settings
Below are the lines represented in the Settings Menu.
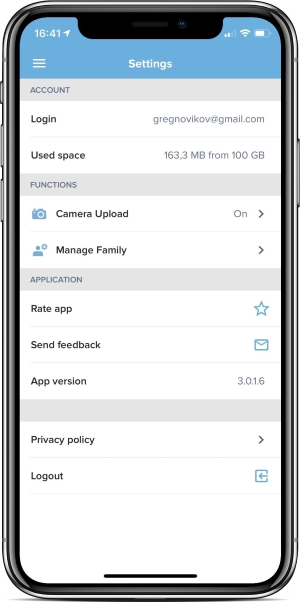
The Settings Menu
Table 5. The Settings Menu
| Line | Description |
|---|---|
| Account | |
| Login | User login |
| Used Space | Current usage of space in cloud storage in MB. Tap this line to see current cloud storage space usage in percent. |
| Camera Upload | |
| Enable Auto Upload | If enabled, Cloudike app automatically backs up all photos taken with a phone camera. |
| Enable Cellular Data upload | If enabled, Cloudike app automatically backs up data via mobile Internet when Wi-Fi is off. |
| Enable Video Upload | If enabled, Cloudike app automatically backs up Video content. |
| Switch upload to Family Cloud | If switched, all backed up content is available to Family Cloud. |
| Application | |
| Send Feedback | User can share his/her opinion about the app and send a detailed report. |
| App version | Specific information about the app version installed on the device. Versioning is a critical component of the app upgrade and maintenance. |
| Privacy Policy, Terms and Conditions | User can review Cloudike Privacy Policy and Terms and Conditions in this section. |
| Logout | User can log out of his or her Cloudike account from the iOS device in this section. |